ElectricMotorcycleForum.com

  • May 22, 2024, 08:47:45 AM
  • Welcome, Guest
Please login or register.

Login with username, password and session length
Advanced search  

News:

Electric Motorcycle Forum is live!

Show Posts

This section allows you to view all posts made by this member. Note that you can only see posts made in areas you currently have access to.

Topics - Farfle

Pages: [1]
1
Zero Motorcycles Forum | 2013+ / Big belt Kits for pre-2017 bikes.
« on: January 07, 2017, 01:11:10 PM »
I am putting together a CAD file for a 4130 18T 8M polychain front sprocket to fit the 1" keyed shaft on the 13-16 bikes. (CAD for this is much harder than you think, as its a custom tooth profile to make the small radius work)

I am wondering if I should open this up into a group buy to bring the price down. Right now My cost is $70/ sprocket in qty 10. You would be left to source the belt and rear sprocket (OTS zero parts) unless there is enough interest in a turnkey kit.

Be warned, the 18T sprocket will drop the S/DS top speed by a few MPH, and SR/DSR owners will drop a dozen MPH and become MUCH more feisty.

Also, the 18T is below Gates recommendation for minimum diameter, so the belt might actually wear out this century.

Let me know if you all are interested

2
Zero Motorcycles Forum | 2013+ / Battery notes from a Farasis Engineer.
« on: December 11, 2015, 08:17:51 PM »
Hello all,  Jackson (Farfle on ES) here.
I am dumping some good info on our batteries as they relate to the Zero bikes. You guys will hopefully find this usefull in your electric journeys, feel free to ask questions, I am happy to keep misinformation to a minimum.

Here is a quick background on the cells, and some long winded do's and dont's:

First, a quick background on the cells:

The 25Ah cells are a solid cell, and are Farasis's oldest chemistry design. They are a manganese-rich cathode (NMC) 25ah cell with excellent cycle life, and acceptable C-rate. These were used in MY13, MY14 and MY15 FX only.

The 27Ah cell introduced for the model year 15 bikes is an adaptation of the 25ah cell chemistry with thinner foils and more of them, this means that there is more active materiel (more capacity)  but less conductive path to get that capacity in and out. So for the slow discharge S/DS bikes, you get more capacity, but they are lower C rate, and cannot handle being used in the FX platform. (Used in MY15 S/DS only)

The 29Ah cell was introduced for MY16, the 29 is Farasis's newest generation of NMC cell, and they are awesome. They have both higher discharge rate (peak and continuous) than the 25Ah cell, and more capacity (especially at higher C rates/cooler temperatures) than the 27. This is used in all MY16 bikes.

Ok, on to the Do's and dont's.

The cells mainly age in two ways (there are other processes going on, but not dealing with those today),

The ways that the cells degrade are:

No.1: The electrolyte reacting with the active components of the cathode and anode in the cells, and releasing gas (calender life),
No.2: The Interaction between the lithium ions and the anode/cathode blend that causes a small amount of damage each time they are cycled. (Cycle life)

These factors affect the cells about equally, but extreme conditions can sway it either way.

Things that speed up degredation, and make your battery sad ( AKA the "Dont's"):

Hot temperatures: This causes the electrolyte to become more reactive. At Farasis, We have one of the most stable electrolyte blends in the biz, and use alot of proprietary tech to keep our cathode/anode blend as least reactive as possible, but the effect is unavoidable.

High voltage: Again, The higher the potential between the cathode and anode, the faster the reaction between the electrolyte and the actives occurs.

Super low voltage: Below a certain voltage (2.0-2.2V/cell) the potential between the cathode and anode is such that the battery has used all its high potential  lithuim, and so it starts picking on the next easiest thing, which is the copper.
 This process is super ugly, as it electroplates the copper off the negative foils (anode) and electrodeposits it onto the positive foils (cathode).
 PERMANENT IRREVERSABLE DAMAGE. This is super dangerous too, as the next time it is charged, that copper gets blasted back to the negative foils and lands wherever it feels like, as the anode isnt designed to deal with copper Ions. So they form big crystal stabby structures called dendrites, which at best can pierce the seperator and cause high self discharge and gassing as the electrolyte nucleates (gas builds up, the cell goes to 0V and looks like a balloon) , or at worst, the dendrite is able to get a solid connection between the cathode and anode, and this causes the cell to short internally and results in fire.
Luckily for you, Zero has an amazing BMS and pack topology that sips hardly any power from the cells in a key-off state, but you still can murder the bike by approaching 0% SOC as slowly as possible until it is at its absolute lowest SOC (state of charge) and the BMS shuts the bike off. What happens is that the bike has the smallest amount of reserve battery then, and the BMS sipping away at that small amount will eventually murder the cells over a period of several years.

Basically, the way to kill a zero the fastest is to either ride it to absolutely dead as possible, and then store it in a shed for six years, or to store it at absolutely tip top charge in direct sunlight in a super hot desert in arizona somewhere. Either way, you will still struggle to kill them before the warrantee is up.

So, to prolong your battery life, you can do the exact opposite. Store the bike in a cool place with a stable temperature at low SOC.
 ~20% or so is fine for S/DS (one BMS sipping on 3-5 cellboxes) or 30-40% for the FX modules (one BMS per cellbox)

When you get done flogging the crap out of your S/DS on a hot day, let it cool down for 4-6hrs before charging it (takes less time for FX modules)

Fast charging is fine, but know that around the .8C mark is the point where at normal ambient temp, you go from cooling off to heating up. If your pack is already hot from a ride thru the desert at WOT, and you fast charge, you are still going to be on a hot pack when you continue your WOT journey. Not a big deal, but you will get some extra high temp degredation. The BMS will keep you from really buggering your pack, so dont worry about it.

Hopefully  this helps you all better understand what goes on "under the hood" on your batteries.


3
Zero Motorcycles Forum | 2013+ / 2015 Zero Mod thread!
« on: March 01, 2015, 05:43:31 AM »
Heya all, long time poster on the sphere, Elmoto etc...

Anywho, I just took delivery of a '15 3 brick DS, and I have a looong list of mods and fixes to do. In the interest of spreading the knowledge on how these bikes go together (as well as general reference) ill be posting up some guides here. 

Hey, there is high voltage here!
Unplug the bike from the wall, key the bike off, and leave it that way. The MBB (main bike board) seems to leave the contactors on at random leaving things live. Luckily zero runs a less-than-lethal battery pack voltage, if you lick your fingers and touch full pack voltage, its gonna let you know you did it, but your not gonna die. That being said, if you touch any of the pack positive and negative wires, you are gonna get an immense arc flash and burn the crap outta yourself, spray molten copper everywhere and generally have a bad time.


Safety rant over. This post will be about  replacing the onboard charger:


Mine had a bad one from the factory, and they were being slow to get me in to fix it, so here is how you do it:

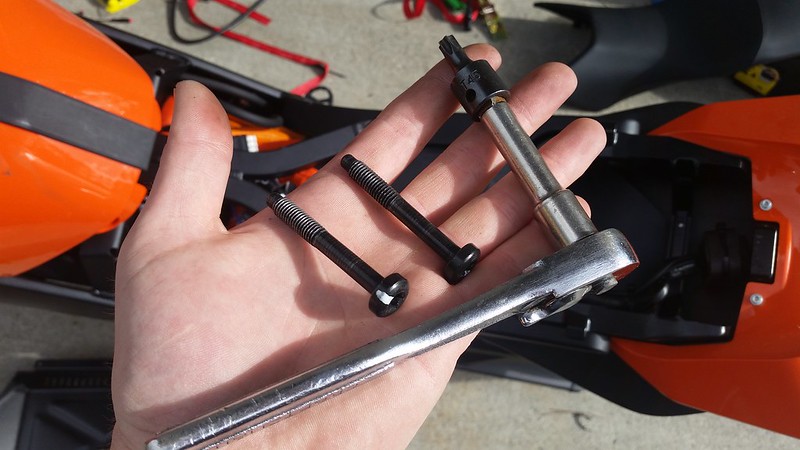
Start by pulling the three little hex bolts (3mm?) from the side panels (BTW everything on the zero is metric thank god)
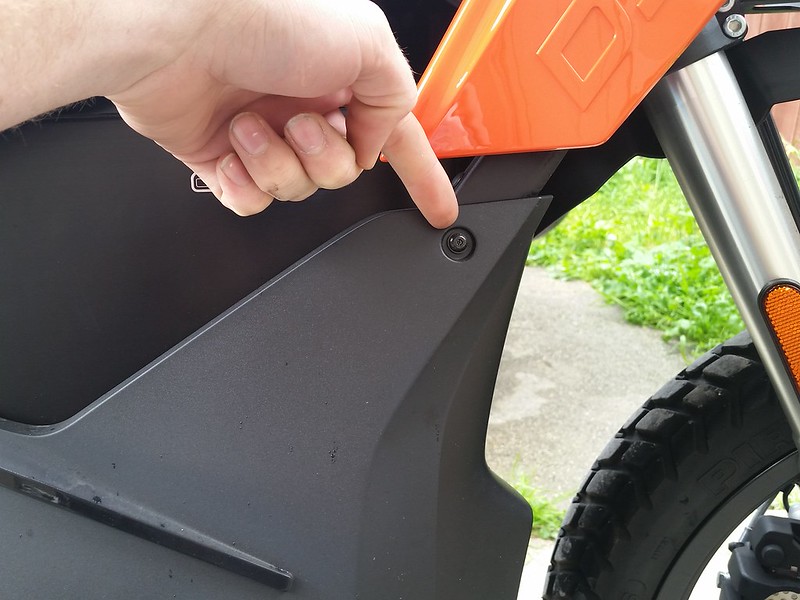
20150228_133825 by edwards8899, on Flickr

20150228_133819 by edwards8899, on Flickr

20150228_133833 by edwards8899, on Flickr


Next, pull the front body panel (I forgot to take pictures of this, its just a few small screws)

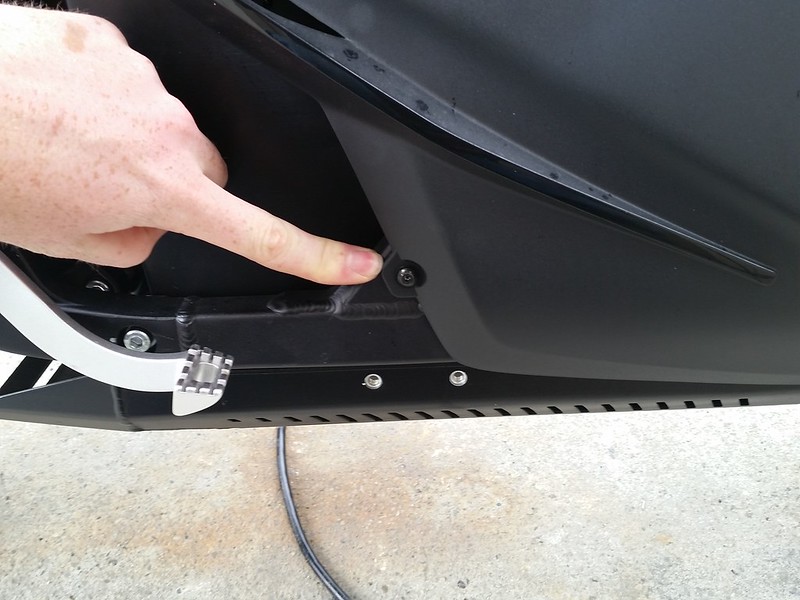
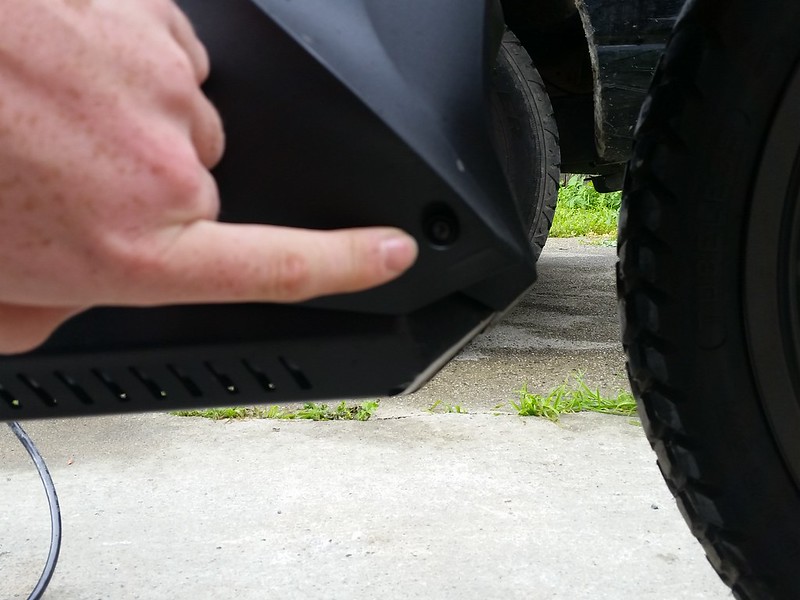
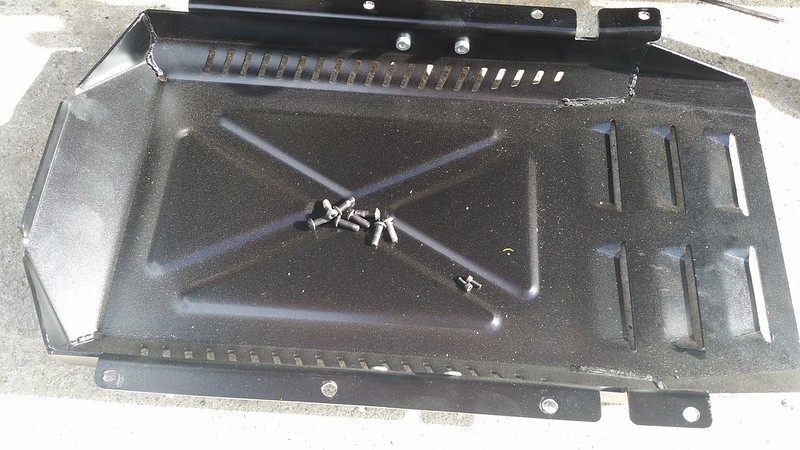
Then, pull the skidpan. The DS has an aluminum one,  I think the one on the S and SR are plastic, but not sure.

Just a handful of easy to find bolts:

photo by edwards8899, on Flickr

popping the seat off also makes things easier. Its the two giant Torx bolts on the frame at the back (T-45?)

20150228_133810 by edwards8899, on Flickr

photo by edwards8899, on Flickr

Next, you will want to remove the wiring from the bike side of things. There are three plugs, one on the AC end of things that's bolted to the bike, (your charge plug) the comm connector (enable signal, can comms etc...) and one plug on the DC side that goes up to the charge wiring harness.

The comms plug just has a tab, pull that one out.
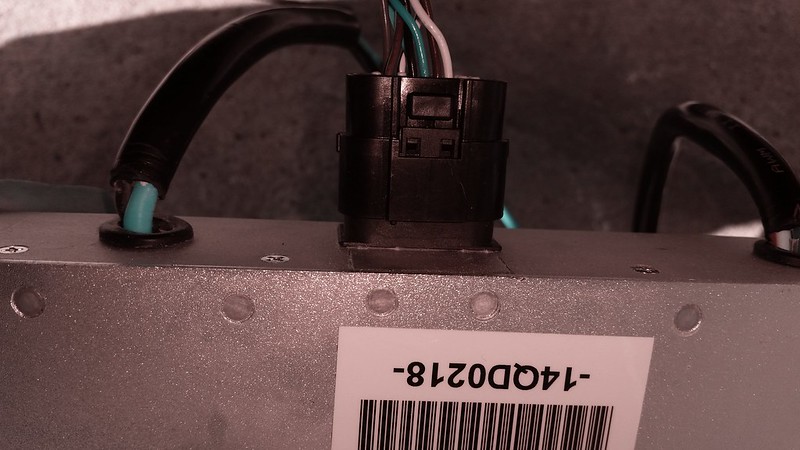
photo by edwards8899, on Flickr

Both of the other plugs are a major pain in the ass.

Starting with the DC plug:

The plug looks like an Anderson SBS 50, but it seems to be a narrower pin pitch with no center data pin set.

Anywho, the DC plug is located in front of the motor against the back side of the battery on the bike's right. They are tucked up between the battery and a frame member, so cut the zip ties (Including the zip tie holding the plugs together) and pull the push on zip tie mount things on the lower half of the cable going to the charger.

Pull down on the charger side of the connector from the bottom while pulling up on the top connector. Sometimes this requires a flesh donation to the motor, so covering the motor with a rag would be smart.

Pull the terminals out of the plug housing, (Google Anderson connector disassembly if you are unfamiliar) and pull it down thru the hole between the motor and frame.
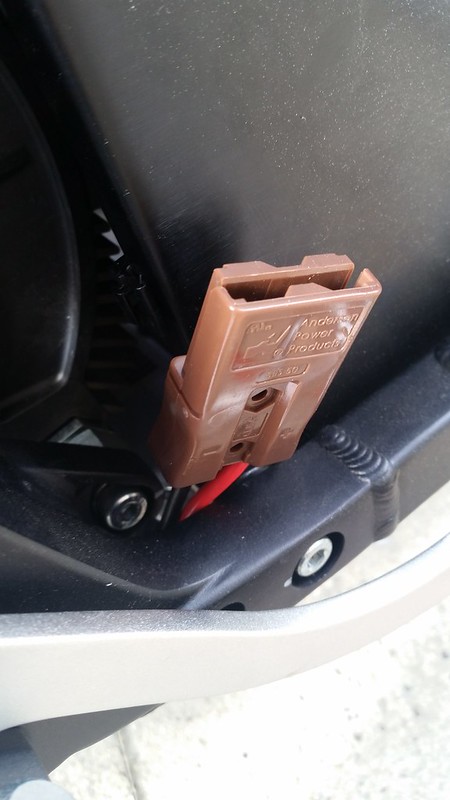
photo by edwards8899, on Flickr

photo by edwards8899, on Flickr

Next, the AC plug. It loops up under the seat and is zip tied on if a handful of places, there is two small bolts on the backside, they are a pain to get to, so get a decent set of hex drivers with handles.

photo by edwards8899, on Flickr

20150228_133913 by edwards8899, on Flickr

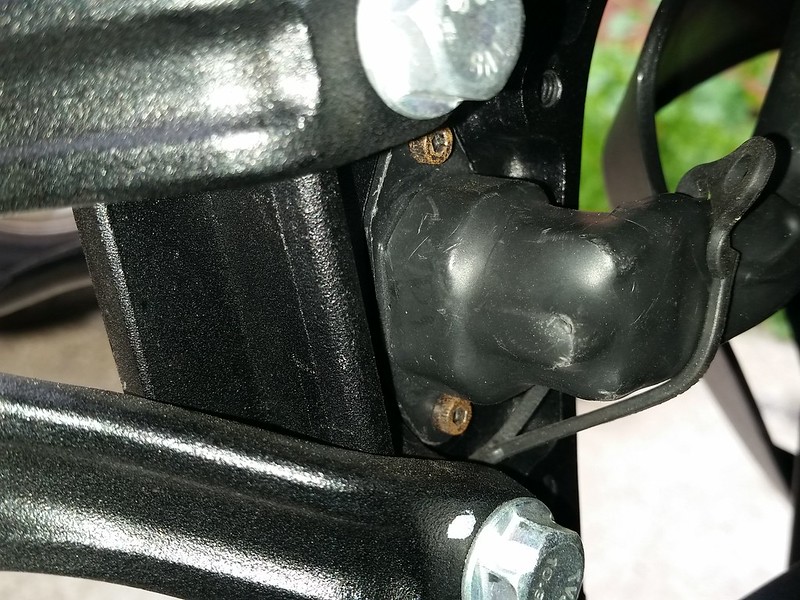
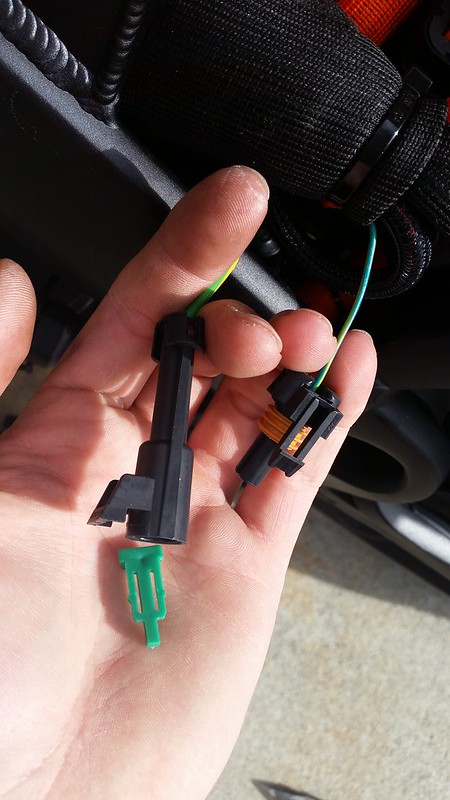
There is a fuseholder plug thing that connects the ground to who-knows-where, you have to squeeze some tabs to get the green locking piece out, then more tabs to get the plug apart.

photo by edwards8899, on Flickr

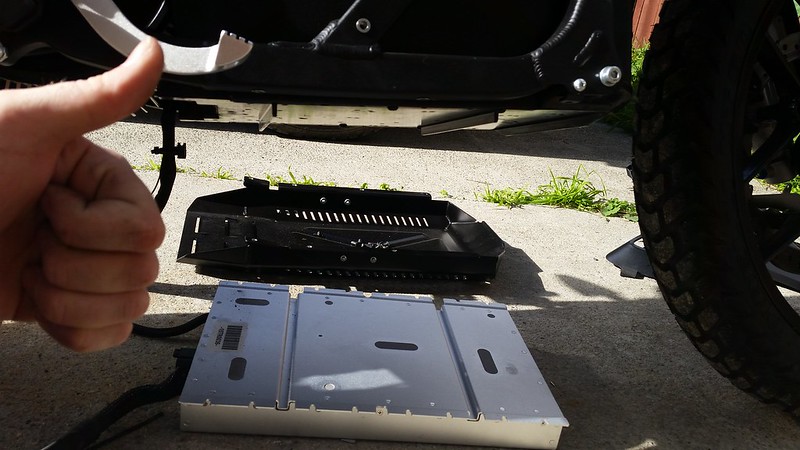
Then, once the cables are out, the charger just has six bolts on the tabs holding it up.

photo by edwards8899, on Flickr

photo by edwards8899, on Flickr

Assembly is the reverse of dis-assembly. I extended the DC wires on my replacement calex/greenwattpower charger, and put the plug set sideways, and up higher to make it easier to get at.

20150228_145637 by edwards8899, on Flickr

20150228_145626 by edwards8899, on Flickr

Pages: [1]